
Table of Contents
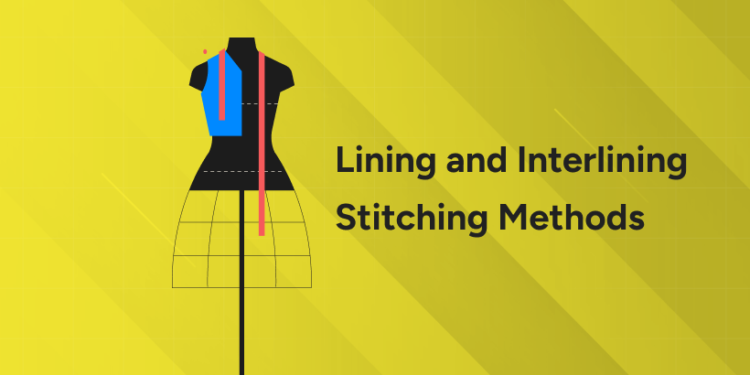
Introduction
Imagine pulling on a good coat on a cold winter morning. It stretches smoothly over your shoulders and is soft and smooth against your skin. There is nothing that scratches, bunches or pulls. That easy comfort is not an accident, it is the product of thoughtful garment construction, especially those with good lining and interlining stitching methods.
Lining is the inner layer between your body and the outer fabric. Its primary function is to provide more comfort and wearability. It has a well-stitched lining which helps clothes to slip on and off easily, prevents irritation, and protects the outer fabric from sweat and friction. When properly attached, it is also used to hang better and give garments a clean and professional finish. Lining is not visible but much more of an integral part in how a garment looks polished when worn.
On the other hand, interlining is a matter of structure and warmth. It is positioned between the outer fabric and the lining to add body, insulation, or shape. Interlining helps keep the collars crisp, coats warm, and jackets look and feel great over time. This layer is securely stitched, ensuring the permanence of it, even after repeated washing and use. Without the proper interlining procedures, clothing can start to fall apart quickly and begin to look flimsy.
Significance
When properly stitched and lining, and interlining, this technique can be a significant improvement to the quality of handmade clothing. These techniques improve durability, comfort, and look. They are less prone to breakage, meaning clothes last longer and need less replacements. Sewn clothing is an excellent way to enhance fit, feel and longevity for anyone who crafts, whether for the hobby or the professional. The invisible details, in fact, make all the difference. The information here uses practical examples and straightforward guidance. Lining and interlining stitching methods bring real improvements to every project. Read on to understand how these layers work together. The results convince most sewers to include them every time.
Consider your favorite jacket that feels just right inside. The smooth interior comes from layers sewn with care. Without these layers, clothes can bunch up or cause discomfort. Lining provides a clean barrier next to the skin. Interlining supports the outer fabric from the middle. Together, they produce pieces that hold up well over years. Both home sewers and experienced makers gain from these techniques. They create custom garments with professional quality. The guide starts with basic differences and moves to detailed methods. It keeps everything easy to follow. Lining and interlining stitching methods prove their worth through better results. Garments become more enjoyable to wear and own.
Learn Advanced Designing & Boutique Skills with Experts. Join Now!
Difference Between Lining and Interlining
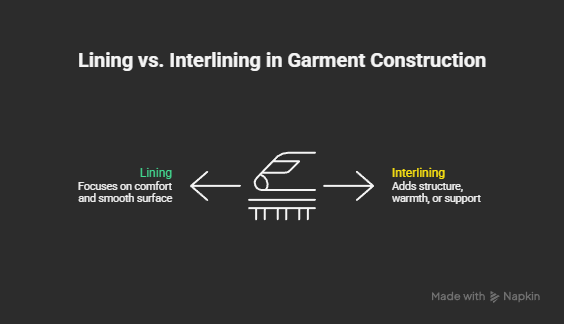
Lining and interlining play separate roles in garment construction. Lining forms the inner layer that touches the wearer’s skin. It covers raw seams and edges to give a finished look inside the garment. This layer helps clothes go on and come off easily. Interlining sits between the outer fabric and the lining. It adds structure, warmth, or support without appearing on the surface. Lining emphasizes comfort and a smooth surface. Interlining focuses on shape and insulation.
Lining uses lightweight, slippery fabrics such as silk, polyester, or rayon. These materials glide against the body and reduce friction. Interlining chooses thicker fabrics like fleece, flannel, or batting. These provide extra body or heat. Lining attaches at specific points like hems, necklines, and facings. Interlining often bonds with heat or sews in place before the lining goes on.
Clarifying the Confusion
People sometimes confuse the two because both stay hidden. Lining always faces inward toward the body. Interlining remains in the middle layer. A winter coat requires interlining to hold warmth inside. A light summer dress might use only lining for better flow and coverage. Lining prevents the outer fabric from showing through in thin materials. Interlining keeps heavy fabrics from stretching or sagging. Both extend the life of the garment, but they do so in distinct ways. Lining protects against sweat and daily rubbing. Interlining maintains form during repeated wear.
Lining stitches directly to the main pieces at edges and key seams. Interlining often fuses quickly with an iron for flat areas. Lining can cover the entire garment or just parts of it. Interlining targets spots like collars, cuffs, or fronts for added strength. Full lining covers the whole interior for a complete finish. Partial interlining reinforces only the areas that need extra support. These choices affect the final weight, drape, and feel of the garment. Light lining keeps things breathable and airy. Dense interlining builds body without too much bulk.
Examples make the differences clear. Silk lining in a dress allows smooth movement and a luxurious touch. Fleece interlining in a coat traps body heat effectively. Both enhance the qualities of the outer fabric. Sewers who understand these roles produce more versatile and reliable garments. Lining and interlining stitching methods build directly on these core differences. They ensure each layer performs its specific job well.
Master Fashion Designing and Create Your Signature Style
Unlock your creative potential with our expert-led Fashion Designing course. Build in-demand skills and step confidently into the world of fashion!
Begin Your Fashion Career Today!Importance of Lining and Interlining in Garments
Lining and interlining improve garments in several important ways. They provide a soft barrier against rough surfaces. This helps to minimize irritation during long-term wear. Lining retains air and a longer life on the outer fabric. Less washes mean a longer lifespan. Interlining provides heat sinks that keep the wearer warm in the cold. It does not trap heat or make it bulky from the outside.
These layers also keep clothes in shape much better. They do not sag, wrinkle, or stretch over time. Hidden seams and clean interiors give professional finishes. People notice the higher quality of lined and interlined pieces. These elements make clothing more comfortable and seem more refined.
When properly lining and interlining, the material will have a better overall durability. Seams are resistant to daily pulling and movement. Tears are less common in the supported areas. Interlining adds stiffness to dense fabrics like wool or jeans. It prevents wear at the elbows, knees, and other stress areas. Lining reduces the time needed for ironing because the surface is smooth. The colors are still bright because the inner coatings reflect light. Custom made garments offer a more tailored fit and structure. Less loose designs form definition and remain equivocal.
Benefits
The aesthetic benefits are very specific. The outside looks neat when the inner construction is not seen. Patterns and textures are apparent without visible seams. Lined clothes provide freedom in terms of drape and movement. Interlining gives everyday clothes a sense of luxury. High-quality coats often have soft, warm interiors that make them feel special. These nuances make a little bit of anything unique.
Versatility
Versatility increases for different seasons and occasions. Light interlining works well for transitional weather. Full lining suits year-round use in many climates. These layers solve common problems like clinging or transparency. They adapt garments to individual needs and lifestyles. The advantages convince sewers to include them regularly. Simple projects gain professional results. Time spent on layers pays off in fewer repairs and replacements.
Protection
Protection extends to weather and skin concerns. Lining blocks wind in outerwear. Interlining insulates against low temperatures. Moisture moves away from the body to keep the wearer dry. Hypoallergenic materials reduce reactions for sensitive skin. These practical benefits highlight the smart decision to use layers. Garments without them wear out sooner and perform poorly. With them, clothes endure daily use and changing trends. The evidence from real results persuades makers to adopt these methods. Quality improves noticeably with each finished piece.
Types of Lining and Interlining Materials
Many fabrics work well for lining and interlining. Lining options start with polyester. It offers strong durability at a low price. Polyester resists wrinkles and dries quickly after washing. Silk lining delivers a soft, luxurious feel. It breathes well and stays light for dresses and blouses. Cotton lining handles moisture effectively. Natural fibers keep the skin cool in warm conditions. Viscose provides a silk-like quality for less money. It drapes smoothly and suits skirts or jackets. Acetate lining gives a shiny satin surface. It sews easily and adds a polished look affordably.
Interlining materials depend on the needed function. Fleece interlining holds heat for winter coats. It feels soft and adds loft without much weight. Flannel interlining brings cozy warmth to casual garments. Cotton-based flannel washes well and softens with use. Batting interlining fills padded items like quilts. Polyester or cotton versions create thickness and insulation. Organza interlining stiffens light fabrics. It stays crisp and sheer for collars or structured details. Hair canvas interlining shapes suits and tailored pieces. Natural fibers provide bounce and flexibility.
Fusible interlinings bond with heat from an iron. Adhesive dots melt to attach firmly. Sew-in interlinings require stitching for secure placement. They allow adjustments in curved or detailed areas. Woven interlinings follow a fabric-like structure for natural movement. Non-woven interlinings resemble felt and cut easily in any direction. Each type matches specific garment needs. Light fusibles suit shirts and blouses. Heavy sew-ins work best in coats.
Examples
Examples show good pairings. Polyester lining handles sweat in activewear. Silk elevates evening gowns with elegance. Fleece boosts comfort in hoodies and jackets. Organza maintains form in bridal or formal wear. These choices perform reliably over time. Wrong matches cause issues like bubbling or separation. Correct ones create smooth, lasting results. Quality materials hold up through washing and wear. Budget-friendly viscose balances cost and function. Natural cotton appeals for breathable, eco-conscious projects. Synthetic blends add strength for frequent use.
Specialty options address unique requirements. Anti-static polyester prevents clinging in dry air. Quilted interlining combines padding with built-in stitching. Water-resistant linings suit outdoor clothing. Stretch interlinings move with knit fabrics. These solve specific challenges effectively. The variety supports all kinds of sewing projects. From basic items to advanced designs, the right materials make lining and interlining stitching methods successful.
Stitching Methods for Lining and Interlining
Stitching procedures are important in making garments secure and neat and professional. Generally, the first place to start is with lining attachment. The construction lining method, also known as interlining method, is where the lining is joined to the main fabric. It uses the same pattern pieces as the outer fabric, but without facings or waistbands. Seams are stitched to match the outer garment and jointed at shoulders, sides, and critical structural areas. It then sews on the lining at the neckline and armhole and is turned right side out to completely cover raw edges.
The slip-lining occurs after the main garment has been assembled. Here, the lining is sewn as a separate shell and attached at hems or openings, either hand- or machine-made. This method allows the lining to hang loose and therefore increase comfort and movement. It is commonly used on dresses and skirts that require flexibility.
Interlining gives structure and support, is either a fusing or sew on technique. Fusible interlining adheres via the heat of an iron to the wrong side of the outer fabric. It works best on flat areas and is fast and consistent. But sew-in interlining, as is usually done, is coiled in with long stitching and treated one layer later with the main fabric. This gives more control when shaping curves, darts or delicate fabrics.
For fully lined jackets, the lining pieces are often cut slightly smaller so that they don’t pull out. After the lining has been assembled, it is attached to the facings and outer shell, turned right side out, and carefully pressed. Partially lined linings only cover small portions to improve drape while underlining is basted early for body on lightweight or sheer fabrics.
Learn Advanced Designing & Boutique Skills with Experts. Join Now!
Master Fashion Designing and Create Your Signature Style
Unlock your creative potential with our expert-led Fashion Designing course. Build in-demand skills and step confidently into the world of fashion!
Begin Your Fashion Career Today!Conclusion
Lining and interlining stitching are two important processes that influence the design, feeling, and performance of a garment. These are not just “hidden” elements; they are vital to comfort, structure and durability. Lining and interlining improve the wear experience and the overall construction quality when used correctly. Garments with well-thought-out interior layers are softer against the skin, drape better over the body and continue to function as intended for longer.
Comfort is one of the most noticeable advantages of proper lining and interlining. Linings reduce the friction between material and body, and thereby make clothing more comfortable to wear, especially in fitted or structured clothes. Interlinings provide a good degree of support that keeps collars, waistbands, plackets and cuffs in place, but not stiff. Together, these layers provide a not rigid, nor loose equilibrium between body shapes and climates.
These benefits, as well as preservation of shape, are also important. Interlining focuses on stressed areas so that them do not nag, stretch, or become distorted over time. Lining protects the exterior from sweat, oils, and abrasion, while also maintaining color and texture. Without such layers, garments are less elastic, and thus the poor fit and shorter life. With them clothes look sleek and professional even after years of use.
Parting Words
Designers and sewists can combine performance with budget and purpose in their wide range of lining and interlining materials. Soft or fusible fabrics are ideal for casual wear and support patterned pieces. Practical stitching such as bagging, understitching, pad stitching, and slip stitching keep sewing patterns clean and secure. These procedures produce consistent results and clear finishes.
Good construction begins with good layering. And good-quality garments, made with carefully woven lining and stitching in between the interlining, become instant favorites, praised for their comfort, fit and durability. When you apply these methods to your next sewing project, the result will be an improved appearance and performance, and a lifelong satisfaction through well-crafted workmanship.
Master Fashion Designing and Create Your Signature Style
Unlock your creative potential with our expert-led Fashion Designing course. Build in-demand skills and step confidently into the world of fashion!
Begin Your Fashion Career Today!Frequently Asked Questions
What is the fundamental, non-negotiable difference between lining and interlining, and why does confusing them lead to project failure?
Understanding the core distinction between lining and interlining is the bedrock of professional garment construction. At its essence, lining is about interface and finish, while interlining is about infrastructure and support. Confusing these two hidden layers is a primary reason why homemade garments can feel unprofessional, wear out quickly, or fail to achieve the intended silhouette.
I’m an intermediate sewer ready to elevate my work. Beyond "it looks nicer," what are the tangible, long-term benefits of investing time in lining and interlining?
Moving beyond aesthetics, the commitment to lining and interlining yields measurable returns in durability, wearability, and satisfaction—transforming a “made” garment into a “crafted” one. The benefits are cumulative and profoundly practical.
How do I choose the right lining material for different types of garments (e.g., a winter coat vs. a silk blouse)? What are the performance trade-offs?
Selecting lining material is a critical exercise in matching properties to purpose. The wrong choice can undermine the garment’s function, leading to discomfort or premature wear. The key considerations are fiber content, weave, weight, and breathability.
Fusible interlining seems so much easier than sew-in. When should I avoid fusibles, and what are the risks of using them incorrectly?
Fusible interlining is a fantastic modern tool, but it is not a universal solution. Its convenience is seductive, but misapplication can ruin a project. The decision between fusible and sew-in hinges on fabric compatibility, desired hand, and the complexity of the garment section.
Can you walk me through the "bagging a lining" method for a lined dress? Why is it considered a professional finish, and what are the common pitfalls?
The “bagging” or “all-in-one” lining method is a technique where the lining and garment are constructed separately as shells, then joined at a single opening (often a shoulder seam or zipper side) and turned right side out, fully enclosing all raw edges. It’s prized for its impeccably clean interior with no visible seam allowances or hand stitching, commonly found in high-end dresses and jackets.
For a fully lined jacket with interlining, what is the correct order of operations? How do I manage these three layers without creating a bulky mess?
Constructing a three-layer jacket (outer fabric, interlining, lining) is an exercise in precision and patience. The golden rule is: Build from the outside in, treating the interlining as part of the outer shell. Mismanaging bulk is the primary challenge, overcome by meticulous trimming, grading, and pressing.
What is underlining (also called flat-lining), and how is it functionally different from both lining and interlining? When would I use this technique?
Underlining is a distinct, powerful technique often confused with lining or interlining. Functionally, it is neither a finishing layer (lining) nor a structural insert (interlining). It is a foundational backing. In underlining, you cut a lightweight fabric (like silk organza, batiste, or lightweight cotton) to the exact shape of your fashion fabric pieces. You then hand-baste the two layers together around the edges, treating them as a single, new composite fabric throughout the entire construction process.
My lined garment feels tight or pulls oddly. What went wrong, and how can I fix or prevent "lining drag"?
“Lining drag” is a common issue where the lining is too small or too tight relative to the outer garment, creating tension, wrinkles, and an uncomfortable fit. It occurs because the lining, often cut from the same pattern pieces, doesn’t account for the differential in ease and behavior between layers.
Are there sustainable and eco-friendly options for lining and interlining materials? How do their performance and cost compare to conventional synthetics?
Absolutely. The growing demand for sustainable sewing has expanded the market for eco-conscious interfacings. The trade-offs often involve cost, availability, and sometimes performance nuances, but the options are viable and improving.
For a beginner intimidated by these techniques, what is the absolute simplest first project to practice lining and/or interlining successfully?
The best beginner project is one that is small, flat, and offers immediate gratification while teaching core skills. Avoid curved seams, sleeves, or complex closures for your first attempt.This project teaches you the essential “bagging” method on a manageable scale, with no fitting issues. Why it works: The pieces are large and flat (rectangles), the seams are straight, and the result is both useful and visibly professional.


