
Table of Contents
Cross stitch is simple to learn. It uses small X-shaped stitches. These stitches create attractive fabric designs. Beginners need only basic stitching supplies. Aida fabric works well for beginners. Embroidery floss creates colorful stitched patterns.
A tapestry needle passes through fabric holes. A hoop keeps the fabric firm. A pattern guides stitch placement and colors. Start near the pattern’s centre point. Then work outward across the design. Keep each top stitch facing one direction. This creates an even finished appearance.
Start with small and simple designs. Flowers, hearts, and letters work well. Simple animals also make good choices. Practice improves stitching speed and accuracy. Careful counting prevents most common mistakes.
Key Takeaways
- Cross stitch uses simple X-shaped stitches.
- Aida fabric makes counting stitches easier.
- Embroidery floss creates colorful designs.
- Tapestry needles suit counted cross stitch.
- Hoops keep fabric steady during stitching.
- Charts show colors and stitch placement.
- Starting centrally helps maintain design balance.
- Consistent stitches create a cleaner finish.
- Small patterns suit beginners best.
- Regular practice improves stitching confidence.
Learn Advanced Designing & Boutique Skills with Experts. Join Now!
What is Cross Stitch?
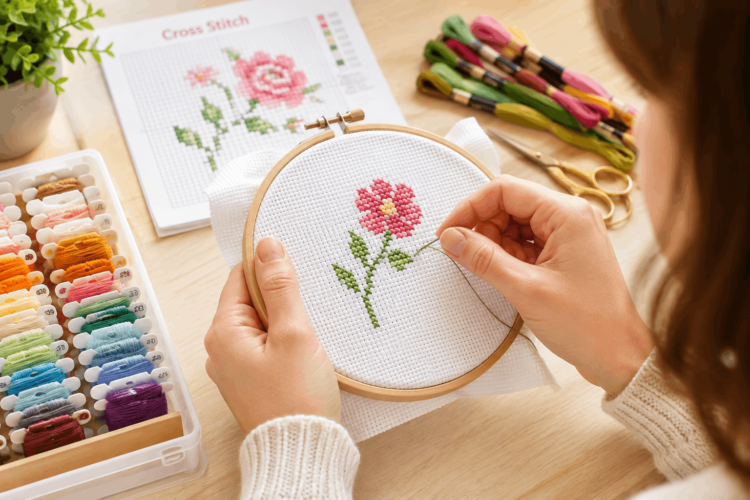
Cross stitch is a decorative needlework technique. It creates designs using crossed stitches. Each stitch forms a small X shape. Multiple stitches create larger pictures. They can also create letters and patterns.
Cross stitch usually follows a fabric grid. This grid helps with accurate stitch placement. Aida fabric provides a visible stitching grid. Its woven holes make counting easier.
How does Cross Stitch Work?
Cross stitch follows a repeated stitching method.
- Bring the needle through one hole.
- Create the first diagonal stitch.
- Bring the needle through another hole.
- Create the second diagonal stitch.
- Cross the first diagonal.
- Complete one X-shaped stitch.
The same process creates larger designs. Each fabric square represents one stitch. Patterns show where each stitch belongs.
What is a Cross Stitch Pattern?
A cross stitch pattern guides the entire project. It shows stitch locations and thread colors. Many patterns use symbols for colors. Some patterns use colored squares instead.
A pattern usually contains several useful details.
- Thread color names.
- Thread color numbers.
- Stitch symbols.
- Pattern centre point.
- Stitch count.
- Special stitch instructions.
Always check the pattern before stitching. This reduces counting and color mistakes.
What is Counted Cross Stitch?
Counted cross stitch uses fabric grids. Stitchers count fabric spaces before stitching. Each space represents a specific stitch. The pattern determines every stitch position.
This method creates accurate designs. It also makes detailed patterns possible.
Why is Cross Stitch Beginner-Friendly?
Cross stitch has a simple basic technique. Beginners can learn the main stitch quickly. The fabric grid provides useful guidance. Patterns also provide clear visual instructions.
Beginners can start with small projects.
- Small flowers.
- Simple hearts.
- Basic stars.
- Tiny animals.
- Short names.
- Simple geometric designs.
Small projects provide quicker results. They also build confidence through practice.
What does Aida Count Mean?
Aida fabric comes in different counts. Count means stitches per fabric inch. Higher counts create smaller stitches. Lower counts create larger stitches.
Common options include:
- 11-count Aida.
- 14-count Aida.
- 16-count Aida.
- 18-count Aida.
14-count Aida suits many beginners. Its holes remain easy to see. Its stitch size also feels comfortable.
Fabric choice depends on several factors.
- Desired design size.
- Pattern recommendations.
- Personal eyesight.
- Stitching experience.
- Desired design detail.
Beginners should choose easily visible holes. This makes counting more comfortable.
Materials Required for Cross Stitch
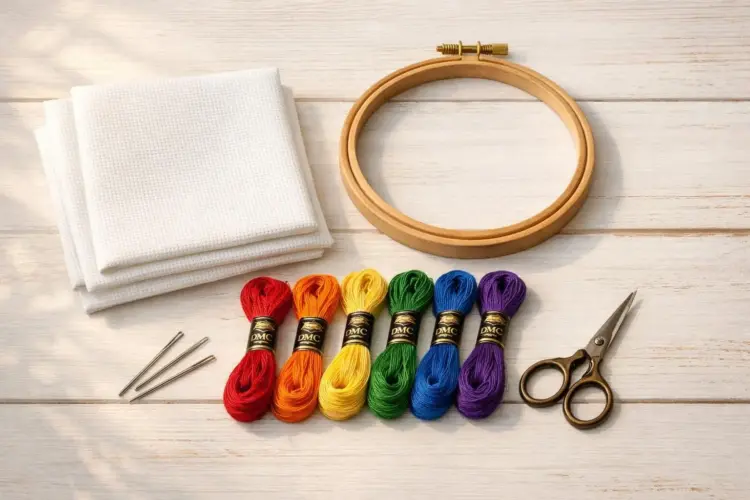
Cross stitch needs only basic supplies. Most supplies are affordable and accessible. Beginners can also purchase complete kits.
What Materials are Essential?
1. Aida Fabric
Aida fabric provides the stitching grid. Its holes guide needle placement. This makes counted stitching easier.
Choose fabric slightly larger than required. Extra fabric helps with framing later. It also makes hoop handling easier.
Beginner tip: Choose lighter fabric colors. White and cream are common choices.
2. Embroidery Floss
Embroidery floss creates the stitched design. It comes in many different colors. Patterns usually specify required thread colors.
Floss often contains multiple strands. Strands can be separated when needed.
Keep these points in mind:
- Follow the pattern’s strand instructions.
- Avoid extremely long thread lengths.
- Separate strands carefully.
- Keep unused floss organized.
- Match colors with the pattern.
Long threads can create unnecessary tangles. Shorter threads usually provide better control.
3. Tapestry Needle
A tapestry needle works well for cross stitch. It usually has a blunt tip. Its eye accommodates embroidery floss easily.
The blunt tip passes through fabric holes. It also reduces accidental fabric piercing.
Choose needle size based on fabric. Pattern instructions may suggest suitable sizes.
4. Embroidery Hoop
An embroidery hoop holds fabric securely. It keeps fabric reasonably taut. This supports more even stitching.
Choose a hoop matching project size. Avoid stretching the fabric excessively.
Check these points before stitching:
- Fabric should remain smooth.
- Hoop should hold fabric firmly.
- Fabric should not become distorted.
- Hoop should remain comfortable.
5. Small Scissors
Small scissors cut embroidery floss neatly. Sharp blades provide cleaner thread ends. Compact scissors are easier to handle.
Keep scissors safely stored after use.
6. Cross Stitch Pattern
The pattern guides the entire project. It shows colors and stitch placement. It may also show special stitches.
Patterns can appear in different forms.
- Printed paper charts.
- Digital charts.
- Mobile applications.
- Downloadable patterns.
- Complete stitching kits.
Choose simple charts for early projects. Clear symbols make counting much easier.
What Optional Tools Can Help?
Some additional tools improve stitching convenience. They are not essential for beginners.
Needle Threader
A needle threader helps insert floss. It helps with smaller needle eyes.
Fabric Marker
A washable marker can divide fabric sections. This can simplify large pattern counting. Always check marker compatibility first.
Pattern Highlighter
A highlighter can mark completed sections. This prevents repeated chart counting.
Use different marks for unfinished areas.
- Completed sections.
- Current stitching area.
- Areas needing correction.
Thread Organizer
Thread organizers keep colors separated. They also reduce unnecessary tangling.
Useful options include:
- Thread cards.
- Small boxes.
- Floss bags.
- Sectioned containers.
Magnifying Tool
Magnification can improve stitch visibility. It can help with smaller fabric counts. Beginners may not need this tool.
Master Fashion Designing and Create Your Signature Style
Unlock your creative potential with our expert-led Fashion Designing course. Build in-demand skills and step confidently into the world of fashion!
Begin Your Fashion Career Today!How to Do the Cross Stitch
The process becomes easier with clear steps. Follow each step before continuing.
Step 1: Choose a Simple Pattern
Start with a small design. Choose fewer colors initially. Avoid highly detailed patterns.
Good beginner choices include:
- Hearts.
- Flowers.
- Stars.
- Simple animals.
- Small letters.
- Geometric shapes.
Step 2: Prepare the Fabric
Cut fabric larger than the design. Leave extra space around every edge. This helps during framing later.
Keep the fabric clean and smooth.
Step 3: Find the Centre
Most patterns show their centre point. Start near this position. Fold the fabric gently in half. Fold it again from another direction. The meeting point indicates the centre.
Match this point with the pattern centre.
Step 4: Place the Fabric
Place fabric inside the embroidery hoop. Keep it firm but not stretched. Tighten the hoop evenly around the fabric.
Check the fabric before stitching.
Step 5: Prepare the Thread
Check the pattern’s color guide first. Select the correct floss color. Separate strands when required. Cut a manageable thread length.
Avoid very long thread pieces. They can easily become tangled.
Step 6: Make the First Diagonal
Bring the needle through one hole. Pull the thread gently through. Avoid pulling the thread too tightly. Move toward the opposite hole. Create the first diagonal stitch.
Step 7: Complete the X
Bring the needle through another corner. Cross over the first diagonal. Insert it through the opposite corner. The two diagonals create one X.
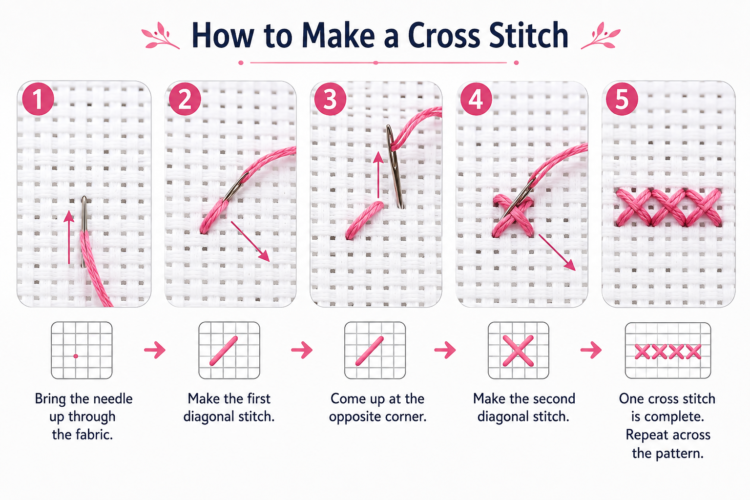
Keep every top stitch facing consistently. This creates a neat overall appearance.
The first X stitch is now complete. Continue by following the pattern carefully. Count each fabric square before stitching.
Step 8: Continue the Stitch Pattern
Work through nearby stitches systematically. Follow the chart from section to section. Keep the stitch direction consistent.
Two common stitching methods are used.
English Method
The English method completes each X individually.
- Make the first diagonal.
- Make the second diagonal.
- Complete the X.
- Move to the next stitch.
This method feels simple for beginners.
Danish Method
The Danish method works across several stitches.
- Make several first diagonals.
- Return across the same row.
- Complete the remaining diagonals.
- Continue toward the next section.
This method can make stitching faster. Both methods can create neat results.
Step 9: Follow the Pattern
Always compare stitches with the chart. Check symbols before changing thread colors. Count fabric spaces between separate sections.
Use these simple habits:
- Mark completed chart sections.
- Check each color before stitching.
- Count difficult areas twice.
- Recheck unusual shapes.
- Follow the pattern centre.
These habits reduce common counting mistakes.
Step 10: Keep Thread Tension Even
Thread tension affects the final appearance. Loose stitches can look uneven. Tight stitches can distort the fabric.
Maintain gentle and consistent thread tension.
Avoid these common problems:
- Pulling thread too tightly.
- Leaving stitches too loose.
- Twisting the embroidery floss.
- Pulling stitches unevenly.
Let every stitch sit naturally. Avoid forcing thread through fabric.
Step 11: Keep Stitch Directions Consistent
Every X should look similar. Keep upper diagonals facing one direction. This creates a smoother finished surface.
Consistent directions provide several benefits.
- Cleaner overall appearance.
- More uniform stitches.
- Better visual balance.
- More professional-looking results.
This small detail makes a difference.
Step 12: Change Thread Colors Carefully
Check the chart before changing colors. Finish the current thread first. Then secure it behind the fabric.
Start the new color nearby. Avoid carrying thread across large gaps.
Long threads behind fabric can cause problems.
- They can create tangles.
- They may show through fabric.
- They can distort the design.
- They can catch during handling.
Cut the thread when needed. Restart near the next section.
Step 13: Secure the Thread
Secure finished threads behind the fabric. Avoid large knots whenever possible. Bulky knots can affect the finished piece.
Use nearby stitches to hold thread ends.
- Leave a short thread tail.
- Pass it beneath nearby stitches.
- Secure it gently.
- Trim the extra thread.
Keep the back reasonably tidy. This helps during later finishing.
Step 14: Add Special Stitches
Some patterns include additional stitches. These usually come after main stitches.
Common examples include:
- Backstitch.
- Half stitch.
- Quarter stitch.
- French knot.
- Straight stitch.
Backstitching creates sharper outlines. Fractional stitches add smaller details.
Always follow the pattern instructions carefully.
What are Common Cross Stitch Mistakes?
Beginners often make simple stitching mistakes. Most mistakes can be prevented easily.
| Common Mistake | Better Solution |
|---|---|
| Incorrect counting | Count fabric spaces carefully |
| Mixed stitch directions | Keep diagonals consistent |
| Loose stitches | Maintain gentle thread tension |
| Tight stitches | Avoid excessive pulling |
| Wrong thread color | Check the chart symbol |
| Long threads behind | Restart closer to the section |
| Poor alignment | Start near the centre |
| Untidy thread ends | Secure threads neatly |
How can these Mistakes be Prevented?
Follow a few simple habits.
- Count before every new section.
- Check colors before stitching.
- Mark completed chart areas.
- Keep stitches evenly sized.
- Use good lighting.
- Avoid rushing detailed areas.
Early checking prevents larger corrections later.
Cross Stitch Ideas and Patterns
Cross stitch offers many creative possibilities. Beginners should choose simple designs first.
What are Easy Cross Stitch Ideas?
1. Floral Patterns
Flowers make attractive beginner projects.
Popular choices include:
- Daisies.
- Tulips.
- Small roses.
- Lavender.
- Simple bouquets.
Use fewer colors for easier stitching.
2. Heart Patterns
Hearts work well with grid-based designs.
Try these ideas:
- Solid hearts.
- Floral hearts.
- Patterned hearts.
- Name-filled hearts.
- Heart borders.
These designs also make thoughtful gifts.
3. Name and Initial Patterns
Names create personal handmade projects. Initials require fewer stitches.
Possible projects include:
- Initial hoops.
- Name decorations.
- Gift tags.
- Small frames.
- Fabric pouches.
Choose simple alphabet charts initially.
4. Animal Patterns
Simple animals create playful designs.
Popular beginner choices include:
- Cats.
- Dogs.
- Birds.
- Butterflies.
- Rabbits.
- Fish.
Choose simple outlines instead of detailed designs.
5. Geometric Patterns
Geometric designs suit counted stitching well. Repeated shapes simplify the stitching process.
Try:
- Stars.
- Diamonds.
- Squares.
- Circles.
- Checker patterns.
- Repeating borders.
Master Fashion Designing and Create Your Signature Style
Unlock your creative potential with our expert-led Fashion Designing course. Build in-demand skills and step confidently into the world of fashion!
Begin Your Fashion Career Today!Cross Stitch vs Embroidery
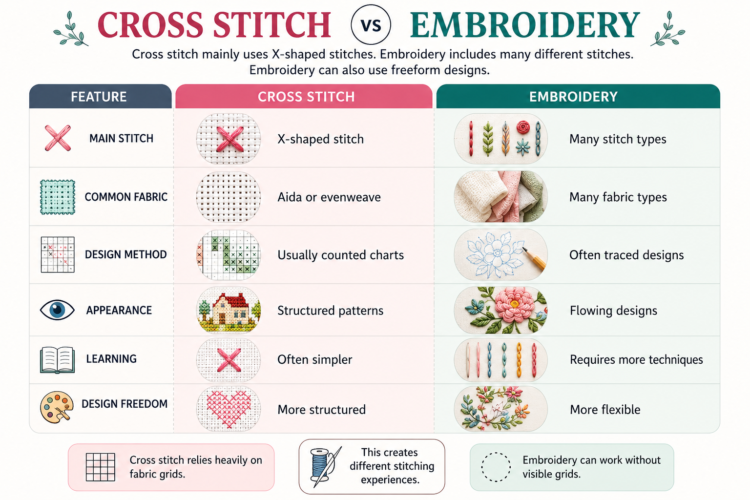
Cross stitch belongs to the embroidery family. However, both techniques work differently.
What is the Main Difference?
Cross stitch mainly uses X-shaped stitches. Embroidery includes many different stitches. Embroidery can also use freeform designs.
| Feature | Cross Stitch | Embroidery |
|---|---|---|
| Main stitch | X-shaped stitch | Many stitch types |
| Common fabric | Aida or evenweave | Many fabric types |
| Design method | Usually counted charts | Often traced designs |
| Appearance | Structured patterns | Flowing designs |
| Learning | Often simpler | Requires more techniques |
| Design freedom | More structured | More flexible |
Cross stitch relies heavily on fabric grids. Embroidery can work without visible grids. This creates different stitching experiences.
Which is Easier for Beginners?
Cross stitch often feels easier initially. Its basic stitch is simple to repeat. The fabric grid provides clear guidance. Charts show exact stitch placement.
Embroidery offers more creative freedom. It also involves more stitching techniques.
Beginners can start with cross stitch. Embroidery can follow with more practice.
What Tips Improve Cross Stitch Results?
Small habits can improve stitching quality.
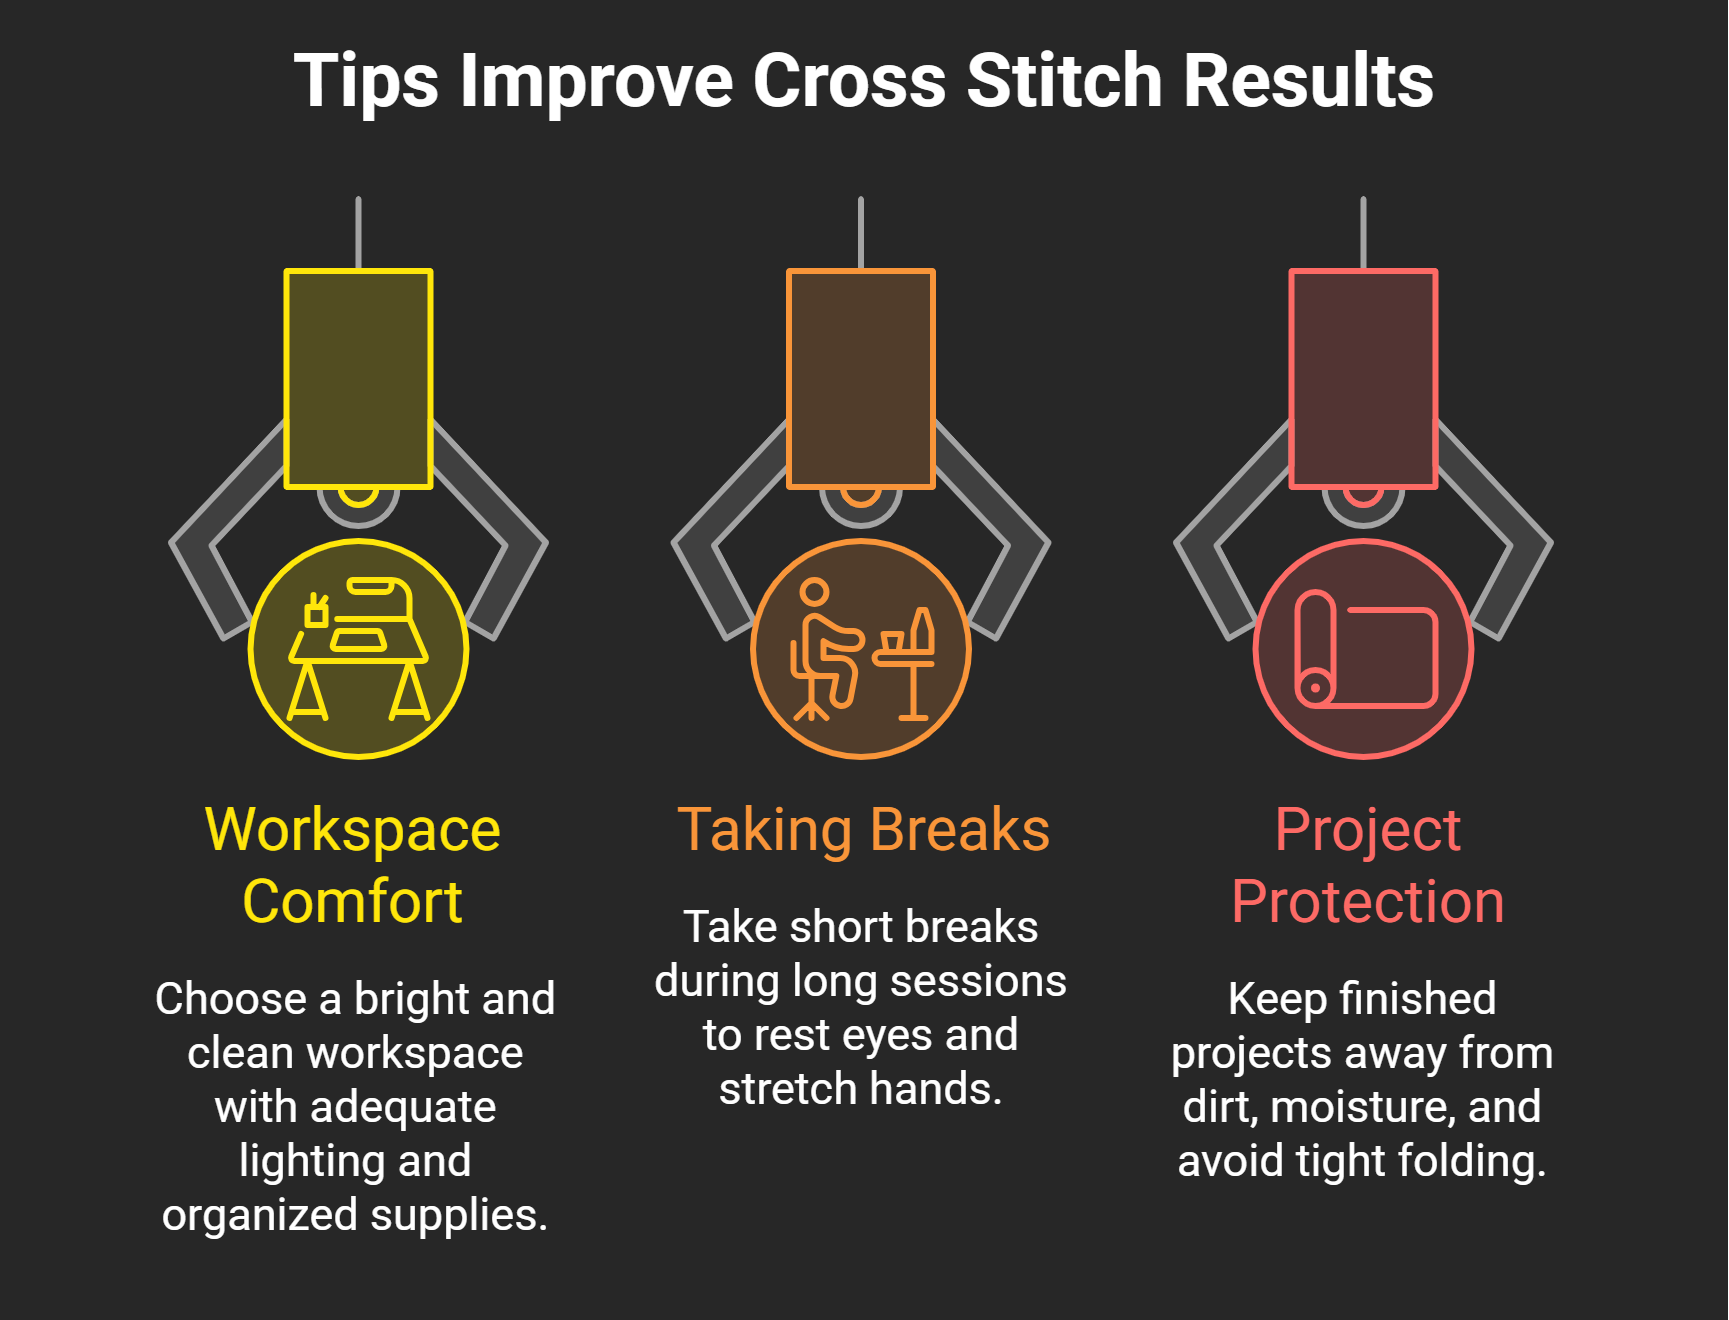
Keep the Workspace Comfortable
Choose a bright and clean workspace.
Helpful habits include:
- Use adequate lighting.
- Keep supplies organized.
- Store needles safely.
- Separate different thread colors.
- Keep the workspace clutter-free.
Good lighting improves stitch visibility. It also helps prevent counting mistakes.
Take Breaks During Long Projects
Long stitching sessions can become tiring. Short breaks help maintain concentration.
During breaks:
- Rest the eyes.
- Stretch the hands.
- Check the stitching.
- Organize loose threads.
- Review the next section.
Returning later can improve accuracy.
Protect the Finished Project
Finished cross stitch needs careful handling. Keep it away from dirt and moisture. Store unfinished projects in clean containers.
Avoid folding stitched areas tightly. Folding can create unwanted creases.
Conclusion
Cross stitch is simple for beginners. It mainly uses repeated X-shaped stitches. Aida fabric makes counting much easier. Patterns guide colors and stitch placement. Basic materials are enough for starting.
Begin with small and simple designs. Hearts and flowers make excellent choices. Names and animals also work well. Keep stitch directions consistent throughout. Maintain gentle thread tension while stitching. Check the pattern before each section. Practice will improve speed and accuracy.
Cross stitch can become a creative hobby. It can also create thoughtful handmade gifts. More advanced patterns can follow later.
Master Fashion Designing and Create Your Signature Style
Unlock your creative potential with our expert-led Fashion Designing course. Build in-demand skills and step confidently into the world of fashion!
Begin Your Fashion Career Today!Frequently Asked Questions
Is cross stitch difficult for beginners?
No, cross stitch is beginner-friendly. The basic X stitch is simple.
What is the easiest cross stitch pattern?
Simple hearts are easy starting patterns. Flowers and stars also work well.
Can cross stitch be done without hoops?
Yes, hoops are not always required. However, hoops improve fabric stability.
How long does cross stitch take?
Project time depends on design size. Larger patterns naturally require more time.
Can regular thread be used?
Embroidery floss is usually preferred. Follow the pattern’s recommended thread.
What Aida count suits beginners?
14-count Aida is commonly beginner-friendly. Its holes are easy to see.
Should cross stitch start from the centre?
Starting centrally can improve alignment. It also helps balance the design.
Can cross stitch be washed?
Some finished projects can be washed gently. Follow suitable fabric care instructions.
Is cross stitch the same as embroidery?
Cross stitch is a type of embroidery. It mainly uses X-shaped stitches.
Can cross stitch become a professional skill?
Yes, advanced stitching can become highly detailed. Finished pieces can also become artwork.