Jupyter Notebook is a web-based interactive computing platform that is typically the first tool we learn about in data science. The majority of us begin our educational careers using Jupyter notebooks. They work well for training, practicing, and conducting experiments.
This article will give useful tips and ideas to help you become more productive when using Jupyter notebook. Discover how to run terminal commands from Jupyter, hide outputs to speed up your notebook, enhance its usefulness, and much more!
“Ready to take your data science skills to the next level? Sign up for a free demo today!”
Top Tips and Tricks to use Jupyter Notebook
A number of helpful Jupyter Notebook tips can be found here.
Shell Commands
Do you exit your notebook to execute a shell command?
An exclamation mark can be used before a command in your Jupyter Notebook to execute shell commands.
For example:
!pip install Tkinter
Magic Commands
There are many useful magic commands in Jupyter to help you with your daily tasks. One quick fix for common issues is to use a magic command, which can list every file in the current directory, among other things. A magic command is handy because it may be added directly to Python code. A magic command starts with %.
These are few helpful magic commands:
Print the current working directory
%pwd
# Show all the files in the current directory
%ls
# Change the working directory
%ls [PATH_TO_DIR]
# List all the variables
%Who
View all the magic commands
There is a long list of helpful magic commands. Use this to see a list of all the magic commands that are available:
%lsmagic
Help with magic commands
To view further information on a particular magic command, select it then press Shift + Tab.
“Ready to take your data science skills to the next level? Sign up for a free demo today!”
View a List of Shortcuts
Over time, you’ll be able to work with Jupyter Notebooks more efficiently if you know helpful shortcut keys. There is no possibility to memorise every shortcut on the extensive list at once. Here’s where it’s useful to see a list of shortcuts:
- Get a Jupyter Notebook open.
- Press Esc to enter the command mode.
- Hit the H key.
- View the complete list of shortcuts.
Measure Cell Execution Time
Use the magic command %%timeit to call timeit. Rather to estimating the time it takes to execute a single line of code, %%timeit determines how long it takes to run all of the code within a Jupyter notebook cell. To utilise it, just start a cell with %%timeit at the top and execute the cell.
%%timeit
import pandas as pd
df = pd.DataFrame({‘a’: range(100000)})
df[‘b’] = df[‘a’] * 5
657 µs ± 6.73 µs per loop (mean ± std. dev. of 7 runs, 1000 loops each)
Add Multiple Cursors
When modifying code, use numerous cursors to save time.
Windows: Drag your cursor by holding alt and left-clicking.
Mac: Drag your cursor using option + left-click.
Extensions to Jupyter Notebooks
The Jupyter Notebook is an excellent tool, yet a basic notebook lacks of functions. Here’s where the extensions start to work.
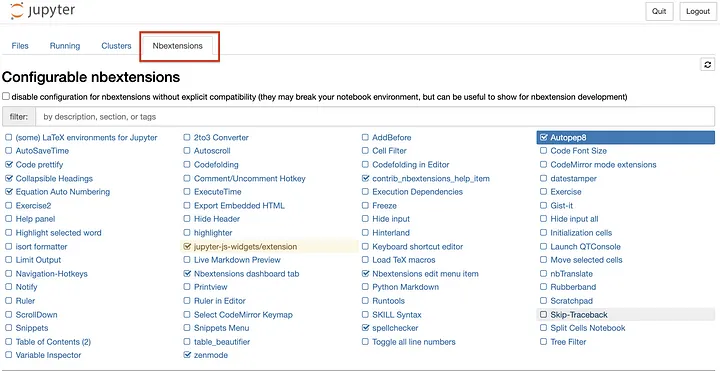
- To install the extensions, type the following command into the command line: pip install jupyter_contrib_nbextensions && jupyter contrib nbextension install
- Then, open a Jupyter Notebook and navigate to the “Nbextensions” tab:
- Click the extensions to make them active. The notebook toolbar now has these buttons:
- For example, you can easily add structure and style to your code with just one click by using the Code Prettify extension
Set Alarm for Program Completion
Set an alarm when your programme is finished running.
Windows
You may set up an alarm to beep on Windows. As an illustration, let’s set a 440Hz alarm for one second, or 1000ms:
import winsound
duration = 1000
freq = 440
winsound.Beep(freq, duration)
Mac
When your programme finishes, you can use the built-in say command to hear something on your Mac instead of a blaring alarm:
import os
os.system(‘say “Your program has now finished”‘)
View the Documentation of a Method
To access a method’s documentation, select it and use Shift + Tab. Press the + icon located at the upper right corner of the modal to extend it further.
Extend the Number of Columns and Rows Shown in pandas
A pandas table has a maximum amount of rows and columns that it can display. But that’s something you can alter.
Let’s say, for example, that the maximum output rows and columns are 1000.
import pandas as pd
pd.set_option(‘display.max_rows’, 1000)
pd.set_option(‘display.max_columns’, 1000)
Hide Unnecessary Output
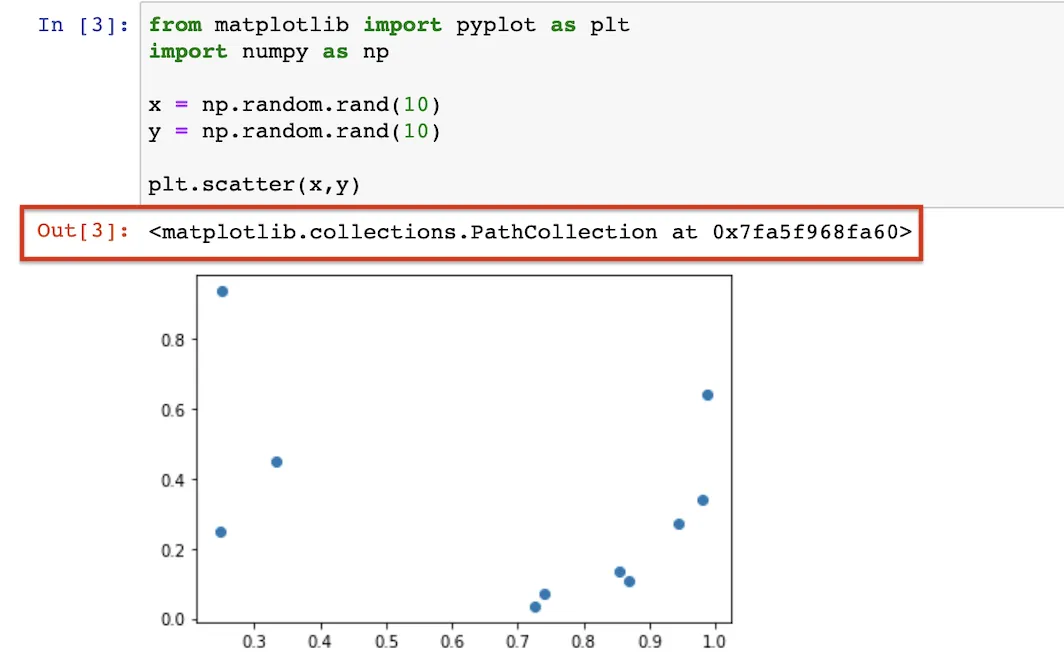
To prevent an obnoxious output, finish a statement with a semicolon. For instance, a rather redundant output appears before the graph when using Matplotlib for plotting.
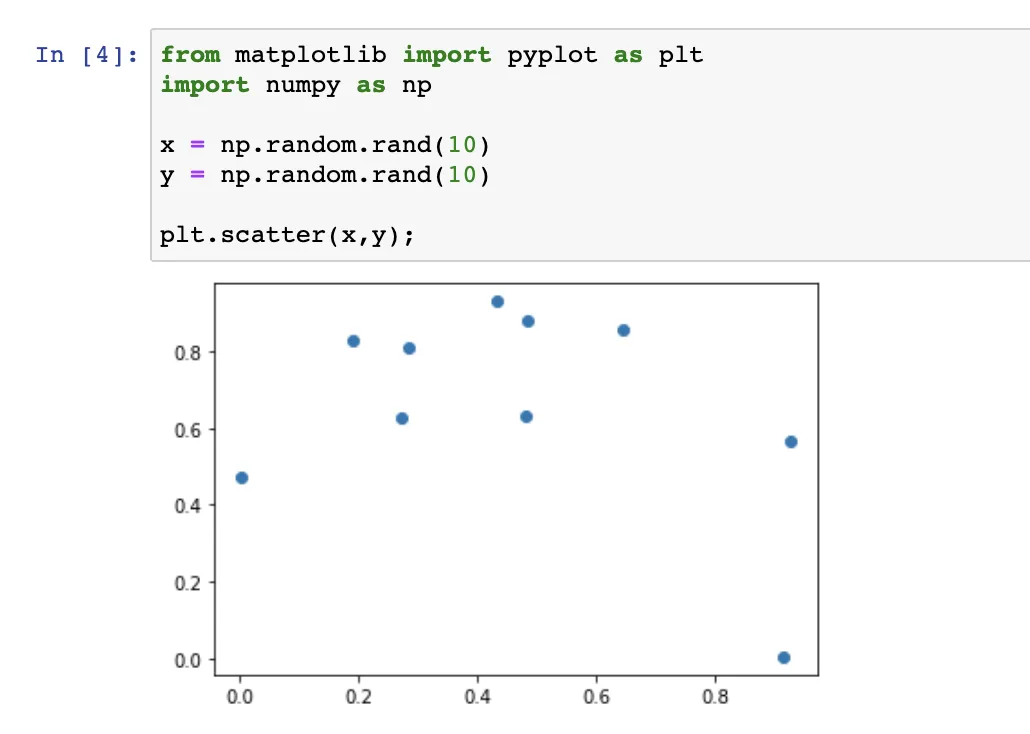
Put a semicolon after the plotting statement to remove this:
plt.scatter(x,y);
Sharing Notebooks
Sharing reports or code source with outputs is essential and you can accomplish it in a variety of ways:
- Use the File > Download as > HTML option to convert Notebooks into HTML files.
- Use File > Download as > PDF to save notebooks as PDFs.
- Notebooks can be downloaded as Markdown or saved as a Markdown file.
- Build blogs with Pelican.
- Share the.ipynb file with others by uploading it to Google Colab.
- Use GitHub Gits to distribute the Notebook file to the general audience.
- Use nbviewer to render the notebook after hosting your file on an external server or the cloud.
Installing Other Kernels for Jupyter Notebook
While the Python kernel is well-known, you can run code in any language by installing different kernels.
For instance, you must install R and IRkernel inside the R environment in order to use the R programming language in a Jupyter notebook.
install.packages(‘IRkernel’)
IRkernel::installspec()
Also, if you have Anaconda installed, you can just run the following command in the terminal to configure R for Jupyter Notebook.
conda install -c r r-essentials
Conclusion:
To sum up, Jupyter Notebook is an effective tool for study, development, and data analysis. We hope that our advice on making the most of Jupyter Notebook will enable you to collaborate more effectively, improve productivity, and streamline your processes.
“Ready to take your data science skills to the next level? Sign up for a free demo today!”


