
Table of Contents
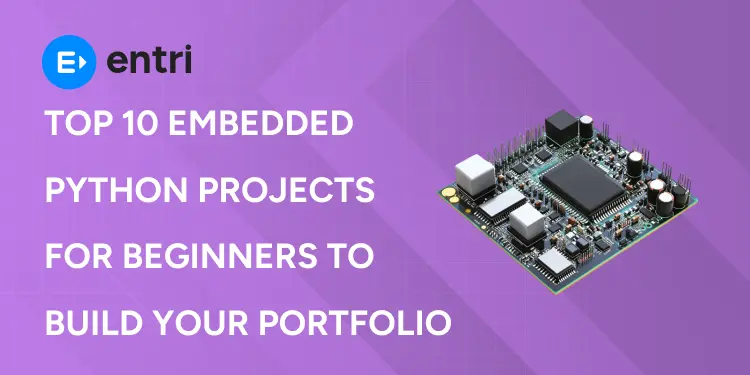
The 10 Projects Below Will Take You From A Blinking LED To A Cloud-Connected Sensor Node
Each one is designed to teach a specific embedded skill: from GPIO control and sensor reading to timing and networking – and also how to build a user-friendly interface. The list is ordered by difficulty so you can start at the top and work your way down, with the knowledge that every one of these projects can be finished on a board that will set you back less than ₹1,000 in India, and they all run on MicroPython or CircuitPython.
Key Takeaways
- Start with the LED and traffic light project. It’s a great place to start learning GPIO output, timing, and state machines, and the best part – no sensors to worry about.
- The temperature logger is the first “real” project you should tackle. It’s where you get to combine sensor reading, data formatting, and file logging – and it’s a huge confidence booster.
- If you want to create an IoT project (like a weather station or MQTT node), you’ll need a Wi-Fi board. The ESP32 is the cheapest option – it’ll set you back around ₹300-₹450.
- If you’re using an RP2040 (Raspberry Pi Pico) you’ll appreciate the clean ADC, which makes it perfect for analog sensors like potentiometers and IR sensors.
- CircuitPython has a head start when it comes to sensor libraries, but MicroPython gives you more control and the ability to multitask.
- Make sure you document every project on GitHub. A good README with photos, wiring, and code is what will really make an impression on potential employers.
Master Embedded Systems Programming!
Launch your tech career with our Embedded Systems Course, designed for hands-on learning and industry readiness.
Know MoreIntroduction
An embedded portfolio isn’t about listing all the courses you’ve done. It’s about showing that you can actually make hardware do something. When you’re looking for a job, recruiters and hiring managers want to see that you can wire up a sensor, write code to read it, and actually produce a result that just works.
Python on microcontrollers makes this a breeze. MicroPython and CircuitPython both give you a Python interpreter on a tiny chip that fits in the palm of your hand. You can test code in a REPL, see immediate results, and iterate without having to go through the usual compile-flash-debug cycle. That instant feedback is probably why Python is such a great choice for building a portfolio – especially if you’re just starting out.
Here are the ten projects below in order of difficulty. Each one builds on the skills you’ve learned from the previous one. By the time you’re done, you’ll have a portfolio that covers all the basics: GPIO, sensors, displays, networking, and cloud communication.
Python For Embedded: MicroPython And CircuitPython Basics

MicroPython is a lean and mean version of Python 3 that’s been slimmed down for use on microcontrollers. It supports ESP32, RP2040, STM32, and loads of other boards. It gives you low-level access – including interrupts and threading, which really comes in handy on the RP2040. The library ecosystem is a bit fragmented, but it’s also very flexible.
CircuitPython is a fork of MicroPython that’s designed to be super friendly to beginners. It appears as a USB drive when you plug it in, and saving a file automatically reloads your code. It’s got over 300 libraries for sensors, displays, and communication modules – so it’s a great place to start for most people.
Learn Embedded Systems Software Engineering
BOARDS YOU CAN USE
| Board | Approximate Cost (India) | Best For |
|---|---|---|
| ESP32 | ₹300–₹450 | Wi-Fi/Bluetooth IoT projects |
| Raspberry Pi Pico | ₹350–₹450 | Clean ADC, PIO, learning fundamentals |
| Raspberry Pi Pico W | ₹500–₹670 | Wi-Fi projects with Pico ecosystem |
| Arduino Nano (clone) | ₹250–₹400 | Arduino ecosystem compatibility |
The ESP32 is the best choice for any project involving Wi-Fi or Bluetooth. The Pico is better for analog sensors because its 12-bit ADC is cleaner than the ESP32’s. The Pico W adds Wi-Fi for roughly ₹50–₹100 more.
Master Embedded Systems Programming!
Launch your tech career with our Embedded Systems Course, designed for hands-on learning and industry readiness.
Know MoreWHAT YOU’LL NEED BEFORE YOU GET STARTED
- A board. Pick one that suits your project – it’s listed above.
- A MicroSD card or onboard flash memory. Most boards have enough for simple projects, but you’ll need to check your board.
- Sensors and components. Each project lists what you’ll need, so pick those out.
- An IDE. If you’re a beginner, Thonny is pretty easy to use – or if you’re using CircuitPython, you might find Mu Editor a bit easier.
- A GitHub account. You’ll need one to document every project you do – it’s a good place to keep track of your work.
TOP 10 EMBEDDED PYTHON PROJECTS
1. A Basic Traffic Light Controller
What you’ll be making: A series of LEDs that cycle through red, yellow, and green in a timed sequence, just like a traffic light.
Components: Three LEDs (red, yellow, green), three resistors, a breadboard, and some jumper wires.
Skills you’ll learn: Getting a GPIO pin to switch on and off, using time.sleep(), state sequencing, and some basic wiring.
Difficulty: Easy to start out with, this is a great beginner project.
This is basically the “hello world” of embedded systems. You’ll learn how to flick a pin on and off, control timing, and sequence states. No need to get any fancy sensors or libraries involved – just the basics.
2. A Simple Temperature and Humidity Logger
What you’ll be making: A device that reads the temperature and humidity every few seconds and spits out the values to the serial console – you can even log them to a file if you want.
Components: A DHT11 or DHT22 sensor and a board with jumper wires attached.
Skills you’ll learn: Reading sensors, formatting data, error handling (because sensors can be flaky), and I/O with files.
Difficulty: Easy.
The DHT22 is a bit more accurate than the DHT11, but you’ll figure that out. In CircuitPython, use the adafruit_dht library. In MicroPython, use the dht module. This project teaches you that real sensors have timing requirements and can fail sometimes – so you’ll learn how to catch those errors and move on.
3. A Smart Plant Watering System
What you’ll be making: A system that reads the soil moisture and then turns on a pump or solenoid valve when the soil gets too dry.
Components: A soil moisture sensor, a relay module, a small water pump, and your board.
Skills you’ll learn: Reading analog sensors, threshold logic, controlling a relay, and even preventing the pump from chattering on and off.
Difficulty: A bit harder than the first two projects – you’ll need to get a bit more advanced.
The soil moisture sensor puts out a voltage that varies with how dry the soil is. You’ll read that with an ADC pin, and then use a relay to control the pump. To prevent the chattering, we’ll add a bit of hysteresis – that means turning the pump on when the moisture level drops, but then only turning it off when the level rises a bit.
4. An IoT Weather Station
What you’ll be making: A weather station that reads the temperature, humidity, and pressure, then sends all those readings to a cloud dashboard over Wi-Fi.
Components: An ESP32 (or Pico W), a BME280 sensor, a board, and some jumper wires.
Skills you’ll learn: I2C communication, Wi-Fi connections, HTTP or MQTT publishing, and even formatting your data as JSON.
Difficulty: Getting a bit more advanced – you’ll need to get connected to the internet and send some data around.
The BME280 is a single sensor that gives you the three readings you need. You’ll connect it to your board, read the values, format them as JSON, and then send the data off to a service like Adafruit IO or ThingSpeak. This is your first connected project, so you’ll be learning that IoT is more than just sensors – it’s about sensors, networking, and data formatting.
5. PIR Motion Alarm
What you’re building: A motion detector that sets off a buzzer or lights up an LED when it spots some movement.
Components: PIR sensor (HC-SR501), some sort of alarm (buzzer or LED), a board to put it all together on.
Things you’ll learn: Reading digital inputs, how to use interrupts (if you go that route), telling if things are in a different state.
Difficulty level: Beginner to intermediate, should be easy to pick up.
The PIR sensor sends out a digital signal when it sees movement, you can either keep checking it all the time in a loop or use an interrupt to get a callback when something happens. Interrupts are a bit more efficient and it’s a good chance to learn how to deal with things happening without blocking the main code you’re running.
6. Relay-Based Home Automation
What you’re building: A system to turn a lamp or other appliance on and off using a relay, with options to trigger it with a button, a schedule, or a command from the network.
Components: A relay module, a push button, an LED to show the status, a board to put it all together on.
Things you’ll learn: How to control a relay, how to make a button work without it getting stuck, managing state (on or off), safely dealing with mains voltage if you’re actually controlling something real.
Difficulty level: A bit more challenging, but worth it.
If you’re dealing with mains voltage, be super careful. Use a relay with some protection from electrical shock between the board and the mains. Or, do a safer version and just control a low-voltage LED strip instead. The skills are basically the same: outputting to a GPIO pin, reading a button’s state (with some debouncing to stop it getting stuck), and toggling state.
7. RFID Attendance System
What you’re building: A system that can read RFID cards, check the card’s ID against a list, and log the user in and the time.
Components: An MFRC522 RFID reader, RFID cards/tags, a board to put it all together on, an optional real-time clock module.
Things you’ll learn: How to talk to the RFID reader using SPI, reading the card ID and verifying it against a list, some basic logging.
Difficulty level: A bit more challenging.
The MFRC522 uses SPI, you read the card ID and compare it to a stored list. If it matches, log the user and the time. Without a real-time clock, you can use the board’s internal clock or fetch the time from the network. This project’s a good chance to learn how to handle these external modules with their own protocols.
8. OLED Sensor Dashboard
What you’re building: A small OLED display that shows the live readings from a sensor (temperature, humidity, or anything else), in a nice layout.
Components: SSD1306 (128×64) OLED display, a sensor to get the data from, a board to put it all together on.
Things you’ll learn: How to control the OLED display using I2C, formatting text, getting the display to update in real-time.
Difficulty level: A bit more challenging.
The SSD1306 is a pretty common, cheap OLED display. In CircuitPython, you use adafruit_ssd1306 and adafruit_display_text, In MicroPython, it’s the ssd1306 module. This project’s a good chance to learn how to present data in a nice, visual way. A dashboard that updates every second looks pretty cool in a portfolio.
9. MQTT Sensor-to-Cloud Node
What you’re building: A sensor node that sends data to an MQTT broker, which can then be grabbed by any subscriber (a dashboard, a database, another device).
Components: ESP32 or Pico W, a sensor (like a DHT22), an MQTT broker (one you run locally or a public one).
Things you’ll learn: The MQTT protocol, how to publish and subscribe, designing topics, QoS levels.
Difficulty level: A bit more challenging, requires some intermediate to advanced knowledge.
MQTT’s the standard protocol for IoT messaging. The node connects to a broker, sends data to a topic (like home/office/temperature), and any subscriber can grab the data. This project’s a good chance to learn the architecture of real IoT systems: devices publish, services subscribe, and the broker routes the messages.
10. Bluetooth Robot Car
What you build: A small robot car controlled via Bluetooth from a smartphone.
Components: ESP32 (has built-in Bluetooth), motor driver (L298N), two DC motors, chassis, wheels, battery pack.
Skills learned: Bluetooth communication, PWM motor control, H-bridge logic, real-time command handling.
Difficulty: Advanced.
This is the most complex project on the list. You need to control two motors with PWM, parse Bluetooth commands, and handle real-time responsiveness. The ESP32’s built-in Bluetooth makes it the natural choice. Start with simple commands (forward, backward, left, right) and add speed control later.
Learn Embedded Systems Software Engineering
PROJECTS AT A GLANCE
| Project | Difficulty | Time Estimate | Skills |
|---|---|---|---|
| LED Traffic Light | Beginner | 1 hour | GPIO output, timing |
| Temperature Logger | Beginner | 1–2 hours | Sensor reading, file I/O |
| Plant Watering | Beginner-Intermediate | 2–3 hours | Analog input, relay, hysteresis |
| IoT Weather Station | Intermediate | 3–4 hours | I2C, Wi-Fi, HTTP/MQTT |
| PIR Motion Alarm | Beginner-Intermediate | 1–2 hours | Digital input, interrupts |
| Home Automation Relay | Intermediate | 2–3 hours | Relay, button, state |
| RFID Attendance | Intermediate | 3–4 hours | SPI, UID validation, logging |
| OLED Dashboard | Intermediate | 2–3 hours | I2C display, text formatting |
| MQTT Sensor Node | Intermediate-Advanced | 3–5 hours | MQTT, publish/subscribe |
| Bluetooth Robot Car | Advanced | 4–6 hours | Bluetooth, PWM, motor control |
Beginner to Advanced Path
- Start with the Traffic Light – it’s the simplest thing to get going with no libraries or sensors needed, just a basic understanding of how GPIO works.
- Add a Sensor – doing the temperature logger project will teach you how to actually read real data, which is a big step up.
- Add an Actuator – the plant watering system or relay project will give you a feel for controlling things in the real world.
- Add a Display – the OLED dashboard will make it much easier to see what’s going on with your data.
- Get Connected – the IoT weather station or MQTT node project will teach you how to get your device online and talking to other devices.
- Bring it all Together – the robot car is a final project that combines motors, wireless comms, and real-time control – a great challenge to take on once you’ve got a good foundation.
How to Showcase Projects on GitHub and in a Portfolio

- Create a Repository for Each Project – call it something obvious like
led-traffic-light,iot-weather-station,rfid-attendance. - Write a README with Some Photos – include a photo of the circuit wired up, a quick description of what the thing is supposed to do, a list of the components you used, and the code.
- Include a Wiring Diagram – you can use a tool like Fritzing or just whip something up by hand.
- Document the Stuff that Went Wrong – it’s not just the ‘perfect’ projects that impress – it’s the ones where you had to debug and work around problems. “The sensor kept failing because I forgot to add the pull-up resistor” tells a much more interesting story than a faultless build.
- Link to a Demo Video – half a minute of what the thing is actually doing is worth ten times more than a big block of text.
Common Mistakes
- Don’t be Afraid to Get Basic – skipping straight to the robot car without getting to grips with GPIO and timing will just end in frustration.
- Read Sensor Datasheets – stuff like timing requirements, voltage levels, and comms protocols are all critical, so take the time to read the datasheet.
- Don’t Leave Pins Hanging – not using pull-up or pull-down resistors is a sure-fire way to get weird and erratic behaviour.
- Don’t Copy Code without Understanding it – if you can’t explain what every line does, you’ve not learned the lesson.
- Document or Forget – if you don’t put the project on GitHub, it might as well not have ever existed to a potential employer.
Learn Embedded Systems Software Engineering
Conclusion
The key to building up an embedded portfolio in a hurry is to start small and build your way up. The LED traffic light takes an hour or so, the temperature logger is another couple of hours, and the MQTT node is a fun afternoon’s work. Each project adds a new skill to your toolkit and becomes a portfolio piece in its own right.
You don’t need a fortune to get started – an ESP32 or Pico is a couple of hundred quid and a sensor is around £5-£10. The total cost for the first five projects is less than buying a textbook.
So go ahead and get started. Pick the traffic light, finish it, put it up on GitHub, and then move on to the next one. That’s how you build a portfolio.
Master Embedded Systems Programming!
Launch your tech career with our Embedded Systems Course, designed for hands-on learning and industry readiness.
Know MoreFrequently Asked Questions
What are the best embedded Python projects for beginners?
Start with the LED traffic light controller, temperature and humidity logger, and PIR motion alarm. These teach GPIO, sensor reading, and interrupts without complex wiring. Then progress to IoT weather station and MQTT sensor node for networking skills. The Bluetooth robot car is the most advanced project.
Which board should I use for embedded Python projects?
Use the ESP32 for Wi-Fi and Bluetooth projects (₹300–₹450). Use the Raspberry Pi Pico for analog sensors and clean ADC (₹350–₹450). The Pico W adds Wi-Fi for ₹500–₹670. Choose based on whether your project needs wireless connectivity.
Do I need prior programming experience for these projects?
Basic Python knowledge helps but is not mandatory. MicroPython and CircuitPython are designed for beginners. Start with the LED project to learn GPIO, then add sensors gradually. Each project builds on the previous one, so follow the order.
What components do I need to start?
You need a board (ESP32 or Pico), a breadboard, jumper wires, LEDs, resistors, and one sensor like DHT11 or DHT22. Total cost for the first three projects is under ₹1,000. Buy components locally or from online electronics stores.
How long does each project take?
The LED traffic light takes about one hour. The temperature logger takes one to two hours. IoT projects take three to five hours. The robot car takes four to six hours. Time estimates assume you have the components ready and basic Python familiarity.
Can I put these projects on my resume?
Yes. Document each project on GitHub with a README, photos, wiring diagram, and code. Employers value practical projects more than certificates. A portfolio with five completed projects demonstrates real capability.
What is the difference between MicroPython and CircuitPython?
MicroPython offers lower-level control and threading on some boards. CircuitPython prioritizes beginner-friendliness with a USB drive interface and 300+ curated libraries. CircuitPython is easier for beginners. MicroPython is more flexible for advanced users.
Do these projects require soldering?
Most beginner projects work on a breadboard without soldering. Jumper wires connect components temporarily. Soldering is only needed if you want a permanent build. Start with breadboard prototypes to avoid damaging components.
Which project teaches the most skills?
The MQTT sensor-to-cloud node teaches the most. It combines sensor reading, Wi-Fi networking, MQTT protocol, topic design, and cloud communication. It is the closest to real IoT product architecture. Complete it after learning sensor basics.
How do I showcase projects to employers?
Create a GitHub repository for each project. Write a README with photos, components list, wiring diagram, code explanation, and what you learned. Include a short demo video. Link your GitHub profile on your resume and LinkedIn. Document debugging challenges honestly.